Salesforce Etiquette: Excusing One’s Self from the Subdomain of a Managed Package

Happy New Year boys & girls! In preparing a new version of an app I released on the AppExchange I came across the interesting problem of needing to excuse myself from my managed package subdomain in order to dynamically grab the content (using the native getContent() method) of a visualforce page that may or may not exist within the package itself.

As you may have noticed previously the standard subdomain for a visualforce page is c.XXX.visual.force.com where XXX refers to your particular salesforce server (na1 for example). On the other hand, when accessing a visualforce page that exists within a managed package the subdomain looks more like NameSpace.XXX.visual.force.com where NameSpace refers to the pre-defined namespace prefix of the managed package.

Normally this is irrelevant from a user’s standpoint, but in my case I needed the Apex controller extension for a managed visualforce page to grab the content of a visualforce page defined within Custom Settings. This means, depending on the settings, the page might exist within the managed package itself or it may be a custom page created solely within an individual Salesforce org. The latter case can cause a problem since when defining a new PageReference using partial URLs the current subdomain is maintained by default.

Well, as it turns out I discovered the solution to this problem is actually quite simple. You can treat any pages outside of your package as if they belonged to a managed package with a namespace prefix of “c” In hindsight this seems obvious given the structure of the standard subdomain of a visualforce page. Many thanks to @jhart from the Force.com discussion boards for pointing me in the right direction with the last post from his thread.

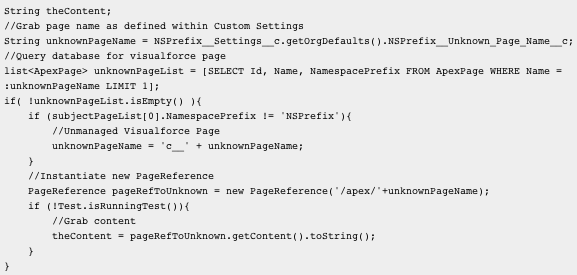
Here’s a snippet of code you could use within an Apex class to accomplish this functionality (You’ll notice I only grab the content when the class is not running within the context of a test – this is because the getContent() method is not allowed within a test context):

Screen Shot 2013-01-07 at 12.38.51 AM

Hope this helps someone, happy coding!

Running the Force.com Plugin for Eclipse on a Chromebook

For all those lucky little boys and girls who will be pulling out a shiny new Samsung Chromebook from their stockings this year I’m afraid I must point out a small lump of coal-you can’t run Eclipse within Chrome OS. As many of you probably already know, Chrome OS does not allow you to install programs in the traditional sense; instead users are expected to download apps from the Chrome Web Store. Since there is no Eclipse app then I’m afraid if you were hoping to use the Force.com plugin on your Chromebook you’re out of luck-the same goes for the standalone Force.com IDE. No deposit no return…BUT WAIT! I think I see one more gift left in Santa’s bag:

You CAN run the Force.com Plugin for Eclipse on your Chromebook by loading Chrubuntu (Ubuntu 12.04 LTS for Chromebook) and following the instructions below.

It took a good amount of tinkering but I’m happy to say I got the Force.com plugin working for Eclipse Indigo on my Chromebook, and more importantly for you, I took note of the required steps so you could do the same (hopefully in much less time). After I installed Chrubuntu and Eclipse on my Chromebook the installation of the Force.com plugin kept causing Eclipse to crash so finally I solved the issue by installing on another computer and copying over the necessary plugin .JAR files-in the steps below I’ve included links where you can download these same files so you can skip the superfluous installation. Afterwards I followed the standard plugin installation instructions provided by Salesforce with the Helios repository (Yes, I said Helios and not Indigo-more on that later) added as another available download site and voila! Enough chitchat-let’s get down to the meat of the sandwich. In order to get the latest (version 26) Force.com plugin for Eclipse working on your Chromebook you will need to:

1. Follow these Chrubuntu installation instructions – many thanks to Jay Lee for his work on this! I would also highly recommend getting your sound working by following George McBay’s suggestions as summarized by Aaron Zak:

1. Open a Terminal (ctrl-alt-T) type ‘alsamixer’ and hit enter
2. Make sure that ‘[Playback]’ is highlighted in yellow, either hit the ‘Tab’ key to cycle through, or ‘F3’ (refresh icon) to select it.
3. Use the cursor keys to cycle over to the following items. For each one you will press the ‘m’ key which will toggle muting for that specific Item. Again, there are many permutations so pay attention that you have the correct combination of Left and Right channels
a. Left Headphone Mixer Left DAC1
b. Left Speaker Mixer Left DAC1
c. Right Headphone Mixer Right DAC1
d. Right Speaker Mixer Right DAC1
4. After you’ve enabled all these channels you can test them using the Sound Control applet and you should hear sound out of each channel
5. If everything works use ALT-Q to exist out of AlsaMixer

2. Install Chromium from the Ubuntu Software Center

Technically you don’t really need Chromium to get the Force.com plugin running with Eclipse, but come on-it’s a Chromebook for crying out loud!

3. Install flash by typing “sudo apt-get install gnash mozilla-plugin-gnash” into a new terminal window (Note: The default login for Chrubuntu is user/user)

Again, you don’t really need to have the gnash plugin for flash, but if you’re like me you might get stuck somewhere along the way and want to watch a youtube video or two for more instructions…

4. Install OpenJDK by typing “sudo apt-get install openjdk-6-jdk”

5. Verify a proper installation by typing “java -version” and “javac -version” to ensure the commands are recognized

6. Install Eclipse from the Ubuntu Software Center (this will install Eclipse Indigo)

7. In a terminal window access the installation directory by typing “cd /home/user/.eclipse/org.eclipse.platform_3.7.0_155965261”

8. Empty the following 4 folders from this directory: configuration, features, p2, plugins by typing “sudo rm -R ./[Folder_Name_Here]/*”

9. Download the required files zip folder hosted on my Google Drive and extract it within your Downloads folder

10. Within the terminal window (which should still be in the Eclipse installation directory from before) open up permissions for the 4 folders mentioned previously by typing “sudo chmod 777 [Folder_Name]”

11. Now, again for each of the 4 folders, type “sudo cp -R /home/user/Downloads/[Folder_Name]/* ./[Folder_Name]/” to copy over the files you downloaded

12. Create a new workspace by typing “sudo mkdir /home/user/workspace”

13. Navigate to this new directory by typing “cd /home/user/workspace”

14. Create a metadata folder by typing “sudo mkdir ./.metadata”

15. Navigate to your new metadata folder by typing “cd .metadata”

16. Download the required metadata zip folder hosted on my Google Drive and extract it within your Downloads folder

17. Within the terminal window (which should still be in the workspace metadata directory from before) copy the generic metadata by typing “sudo cp -R /home/user/Downloads/metadata/* .”

18. Create a new plugins folder by typing “sudo mkdir .plugins”

19. Navigate to your new plugins folder by typing “cd .plugins”

20. Copy the plugin metadata downloaded previously by typing “sudo cp -R /home/user/Downloads/plugins2/* .”

21. Navigate to your user directory by typing “cd ../../..”

21. Open up permissions for your workspace folder by typing “sudo chmod -R 777 ./workspace”

22. Fire Up Eclipse (be sure to choose “/home/user/workpace” as your workspace)

23. If the Force.com plugin is not already active then go to Help>Install New Software

24. Click “Available Software Sites”

25. Uncheck all sources with URLs similar to “download.eclipse.org/releases” except the one that ends with “/helios” (If needed you can add this source) This is an important deviation from most of the other installation instructions I’ve found on the web for getting the Force.com plugin to work with Indigo; you must use the Helios repository or Eclipse will crash upon the Force.com plugin installation

26. After this, you may follow the typical Force.com plugin installation instructions

After restarting Eclipse you should have the Force.com plugin working on your new Chromebook-merry coding to all, and to all a good night!

ForceEclipseChrubuntu

Solving the Salesforce Managed Package Redirecting Problem

If you have developed an app being offered on the AppExchange then you may have noticed some interesting behavior by Visualforce redirects once customers install your package.

Let’s say you have a Visualforce component embedded within a Visualforce page included in your package and you would like the page to simply refresh after a save. You will notice some odd functionality when customers embed your component within their own custom Visualforce pages. Depending on the context of where your component is used, Salesforce may try to add your namespace prefix automatically-this can lead to serious issues, especially if the Visualforce page is being hosted by a Salesforce Site. Strangely, the redirect will often work perfectly within your developer org so this can be a tricky issue to debug.

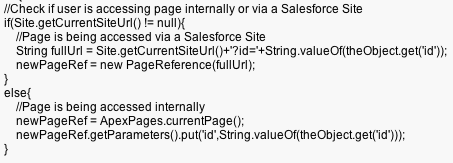
After tinkering with this I’ve come up with the following resolution. The Apex code below, when used within an extension of your Visualforce component, should properly refresh a page whether the component exists within a native Visualforce page of your managed package or within a customer’s custom Visualforce page. Likewise, the refresh will behave properly whether the page is being accessed internally or via a Salesforce Site. This is a tweak on a solution originally proposed by d3developer here-so many thanks to him or her for getting me started in the right direction.

RedirectSolution

As you may have already guessed, prior to this snippet I declared the newPageRef variable to be an instance of the PageReference class and theObject is an instance of the generic sObject class (Depending on your code you may want to just use ApexPages.currentPage().getParameters().get(‘id’) ). Hope this helps-happy coding everyone!

Cascade Insert with External Id Fields

Many times I have run into the situation where I would like to insert a parent record and its children into Salesforce’s database simultaneously. This can be a little tricky if you are inserting a list of parent records and would like to instantiate the children records prior to the commit of said list because then you do not yet have the Salesforce Ids for the children records to reference. External Id fields to the rescue!

Instead of instantiating the children with the lookup relationship  field being set to the parent record’s Id you can define the reference field to be set equal to an empty record of the parent’s sObject type that was instantiated with the same external Id field value as the parent record the child should lookup to:

Parent__c p = new Parent__c(Name=’ABC’,External_Id__c = ‘123’,Description__c=’ABCs and 123s’);

Parent__c refToP = new Parent__c(External_Id__c=’123′);

Child__c c = new Child__c(Parent__r = refToP);

insert p;

insert c;

Oddly enough, you have to create the empty record refToP that is instantiated with the external id field value of p – you cannot simply set c’s reference field Parent__r equal to p itself. That said, you do not have to actually insert the empty record refToP into your database-so no harm, no foul.

Thanks to the following site for helping me find this solution:

http://blogs.developerforce.com/engineering/2012/02/cascade-insert-with-external-id-fields.html

Using the String.split() method with a Pipe Delimiter

Today I noticed a very interesting fact about the String.split() and String.contains() methods within Salesforce while attempting to iterate through a text field that contained one or more pipe (|) delimited strings. First, I ran a check to ensure that the text contained the pipe delimiter by using the String.contains() method. If it did contain the pipe delimiter, I then used the String.split() method to create a string array. Upon running my code and seeing that it did not execute as I intended I ran a few System.debug() calls and noticed that String.split(‘|’) will actually split a string into an array of its characters rather than splitting around the pipe delimiter itself. In order to correct this issue I had to change my split call to String.split(‘\\|’), which splits the string using REGEX matching. I then updated my contains call to String.contains(‘\\|’) only to find that the String.contains() method was searching for the literal string ‘\\|’ instead of utilizing REGEX matching so I had to change it back to String.contains(‘|’). In sum, be careful how you utilize REGEX matching when using the String.split() and String.contains() methods!

BAD–>String.split(‘|’)

GOOD–>String.split(‘\\|’)

BAD–>String.contains(‘\\|’)

GOOD–>String.contains(‘|’)

EDIT: Another note on the String.split() command – if you need to include any trailing empty strings after the final pipe delimiter be sure to insert -1 as a second parameter to the method like this:

String.split(‘\\|’,-1)


Thanks to these sites for helping me resolve this issue:

http://www.laceysnr.com/2010/03/string-splitting.html

http://stackoverflow.com/questions/6978901/splitting-a-string-using


Preserving Your Tab Style’s Color Scheme within a VFPage when showHeader is False

Sometimes it is necessary to set the showHeader attribute of the apex:page tag to false within your Visualforce page. Unfortunately, doing this causes you to lose any color scheme brought over with the tab style you set up when initially creating the page. If you are unhappy with the default color scheme you are left with then there is a way to bring back the color scheme of your tab style by inserting a modest amount of CSS into the page.

First, with the showHeader attribute still set to true, load your Visualforce page. You will need to inspect a few elements’ CSS values to emulate the same color scheme once we set showHeader to false. If you are using Firefox, right-click the very top border of the page, just under the header, and select “Inspect Element” If you clicked the correct area, then the entire Visualforce page area should be selected. In the bottom right corner of your screen select “Style” and then on the side panel that appears search for a section that says “.bPageBlock {border-top: 4px solid [SOME COLOR]}” Take note of the color written here-mine was rgb(49,148,49).

Next, right-click the sub-header on your Visualforce page, select “Style” and search for a section that says “.pbSubheader{background-color: [SOME COLOR]}” Take note of this color as well-mine was rgb(126,180,126).

Next, you will want to edit your Visualforce page. First, set the showHeader attribute in the apex:page tag to false and then insert the following code below your apex:page tag line (replacing the color values with those you took note of earlier):

<style type="text/css">
.bPageBlock {
    border-top: 4px solid rgb(49,148,49);
}
.pbSubheader {
    background-color: rgb(126,180,126);
}
</style>

That’s it! Now after saving your header should be gone, but the original color scheme should remain…


CloudSpokes – Magical Disappearing Salesforce Button with jQuery

I just submitted an entry for my second competition at CloudSpokes; here is a link to the page that describes the challenge. This time we were asked to utilize javascript to make a custom button disappear from the account object’s standard page layout if a custom field had a value of “Low.” Here is a video displaying my entry:

CloudSpokes – Magical Disappearing Salesforce Button with jQuery Demo

EDIT: Special thanks to @myduomo for helping me find a bug in my original code!

CloudSpokes – Simple Timer & Timecard System for Salesforce

I recently found this cool site – cloudspokes.com – that hosts developer challenges for Salesforce and other platforms. I recently submitted an entry for my first competition; here is a link to the page that describes the challenge. Essentially we were to create an electronic timecard system by creating a Visualforce page and inserting it into a few objects’ page layouts. Here is a video displaying my entry:

CloudSpokes – Simple Timer & Timecard System for Salesforce Demo

Calculating Exponents with Fractions in APEX

Shockingly, the ability to calculate exponents containing fractions is (as of this posting and to the best of my knowledge) not yet supported within Salesforce. This can cause serious issues for any Salesforce users that require very exact calculations, such as those within the financial industry. I urge anyone reading this post to go here and promote the idea of adding this functionality to the native platform.

That said, I actually do have a way to get around this until Salesforce provides native support. Although Salesforce currently only accepts positive, integer values as exponents the EXP function and LN function accept any number, including decimal values. Using a little math you can rearrange the problem-see the example below:

a = b^(c)

ln(a) = c * ln(b)

a = e ^ [ c * ln(b) ]

Rearranging the problem into this format allows you to utilize the EXP and LN functions, which as mentioned before, can accept decimals and negative values alike.

So, if you are creating a formula field try using:

EXP(c * LN(b))

as opposed to b ^ (c)

and/or if you are developing an Apex class try using:

Math.exp(c * Math.log(b))

as opposed to Math.pow(b,c)

I have also posted this in the developer discussion boards for future reference, which can be found here.

Hope that helps and if you have any other workarounds you’ve used to circumvent the limitations of Salesforce’s Math methods then let’s hear ’em in the comments!

Tagged , , , ,